
TM 5-3820-233-12/1
soon enough with the next load, that the previous one
way.
acts as a cushion, thereby saving unnecessary wear on
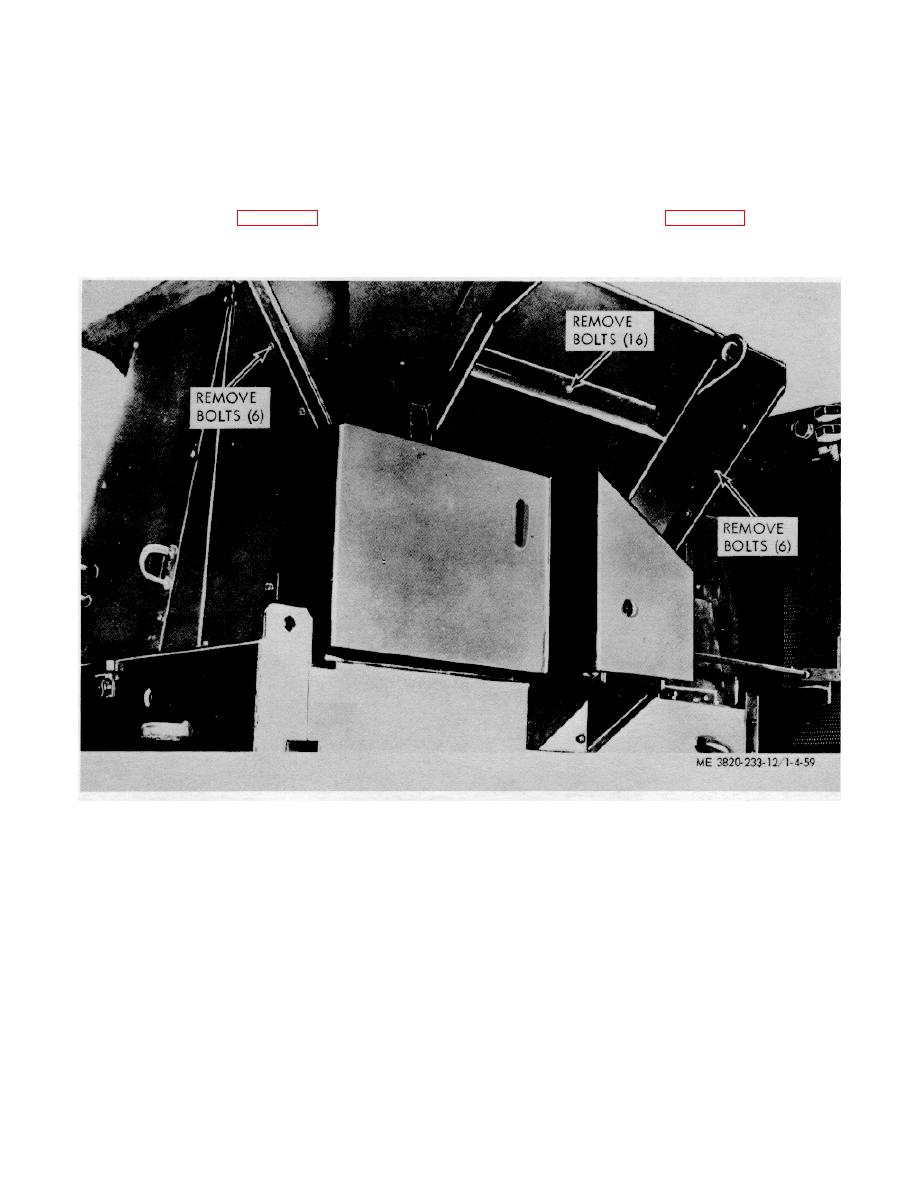
(2) Remove bolts (16) attaching hopper to frame.
the hopper and at the same time keeping it full of
(3) Remove bolts (6) attaching hopper to
material. Each load should be placed in the center of the
supports.
hopper and allowed as short a "free-falling" as possible,
(4) Using suitable hoist lift hopper from frame.
b. Inspection. Inspect the hopper for excessive wear
to prevent injury to the operating personnel and damage
to the machine from spillage.
or damage. Replace if necessary.
a. Removal. Refer to figure 4-59 and remove the
c. Installation. Refer to figure 4-59 and install hopper
hopper as follows:
in reverse procedure of removal.
(1) Remove bolts (6) attaching hopper to walk-
Figure 4-59. Hopper, removal and installation.
4-56
