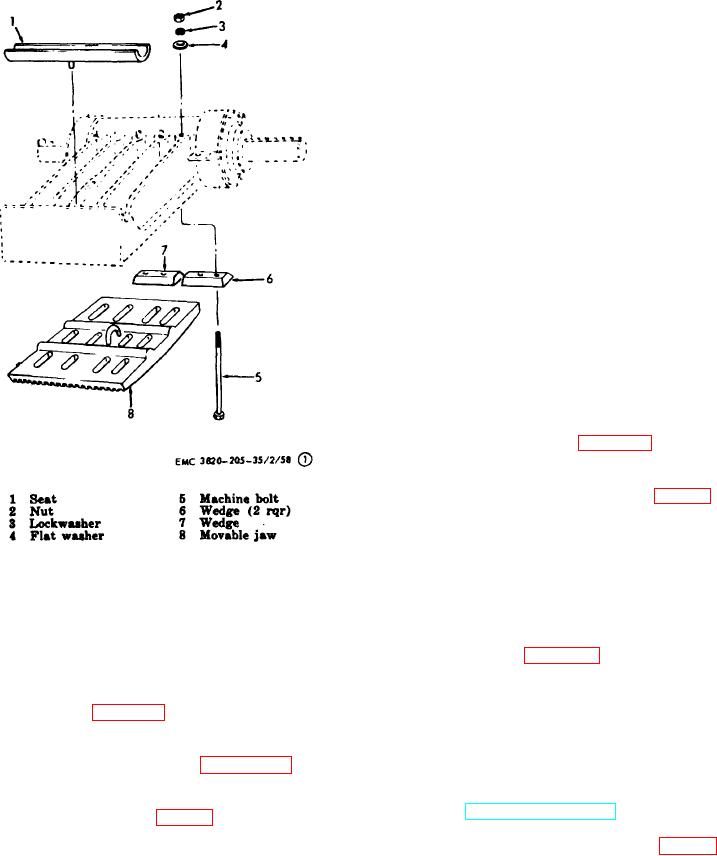
162. Pitman Assembly Cleaning, Inspection, and
Repair
a. Cleaning. Clean and inspect all parts in an
approved cleaning solvent and dry thoroughly.
b. Inspection and Repair.
(1) Inspect all seals for wear, nicks, and
deterioration and replace as necessary.
(2) Inspect the split sleeve and locknuts for
breaks, cracks, or damaged threads and
replace as necessary.
(3) Inspect bearings, for cracks, worn rollers, or
any other damage and replace as
necessary.
(4) Inspect all other metal parts for damage and
repair or replace as necessary.
163.
Pitman Assembly Reassembly and
Installation
a. Reassembly. Refer to figure 49 and reassemble
the pitman assembly in the reverse order.
Note. Install the spacers (30, fig. 49(2) and
bearings (29) on the shaft (28) and install
as an assembly in the pitman (31). Make
certain that the shaft is centered in the
Figure 49. Pitman assembly, exploded view.
movable jaw before securing the
housings and sealers.
(2) Remove the tension spring and rod
assembly (TM 1-38202-20/2).
b. Installation.
(3) Remove the toggle plate from the bottom of
(1) Refer to figure 48 and install the pitman
the crusher assembly by pushing the
assembly on the unit.
movable jaw forward.
(2) Install the toggle plate in the bottom of the
(4) Refer to figure 48 and remove the pitman
crusher assembly by pushing the movable
assembly.
jaw forward and positioning the plate in the
toggle seats.
Refer to figure 49 and
b.
Disassembly.
disassemble the pitman assembly.
(3) Install the tension spring and rod assembly
Note. Remove the shaft (28, fig. 49(2), spacers (30),
and bearings (29) from the pitman as an assembly,
(4) Install the crusher assembly (par. 33).
and remove the bearings and spacers from the
shaft.
(5) Adjust the crusher assembly (TM 5-3820-
205-20/2).
AGO 8456A
95

