
TM 5-3820-233-35/1
sories should be turned on during the test to
prevent excessive voltage. To adjust the cur-
rent regulator setting, turn the adjusting
screw at the base of the unit thereby changing
the spiral spring tension. Increasing the ten-
sion will increase the current setting. After
each change of adjustment, reduce generator
speed until cutout relay opens, then return to
speed and read current. (Higher residual
magnetism resulting from uncontrolled volt-
age during this test will cause the voltage to
regulate at an abnormally low voltage after
the jumper is removed. To restore proper op-
eration, the generator must be "cycled", that
is, stopped and restarted. Do not attemp to
check voltage regulator after using JUMPER
LEAD METHOD until this condition has
been corrected.)
f. Installation. Refer to Operator's Manual.
32. Radiator Assembly
Checks.
The radiator assembly is
a. General.
mounted on the front of the engine. As the
water flows through the radiator core, it is
cooled by air forced through the core by a
belt driven fan. A guard is attached to the
fan shroud to prevent loose clothing, hands,
and other objects from becoming entangled
in the fan blades.
b. Removal and Disassembly
(1) Remove the power unit (para 24).
(2) Drain the radiator.
(3) Remove the hoods, side panels, and
tie rods (Operator's Manual).
(4) Remove and disassemble the radiator
assembly in the numerical sequence
as illustrated on figure 10.
c. Cleaning, Inspection, and Repair
(1) Flush the inside of the radiator with
an approved cleaning solvent.
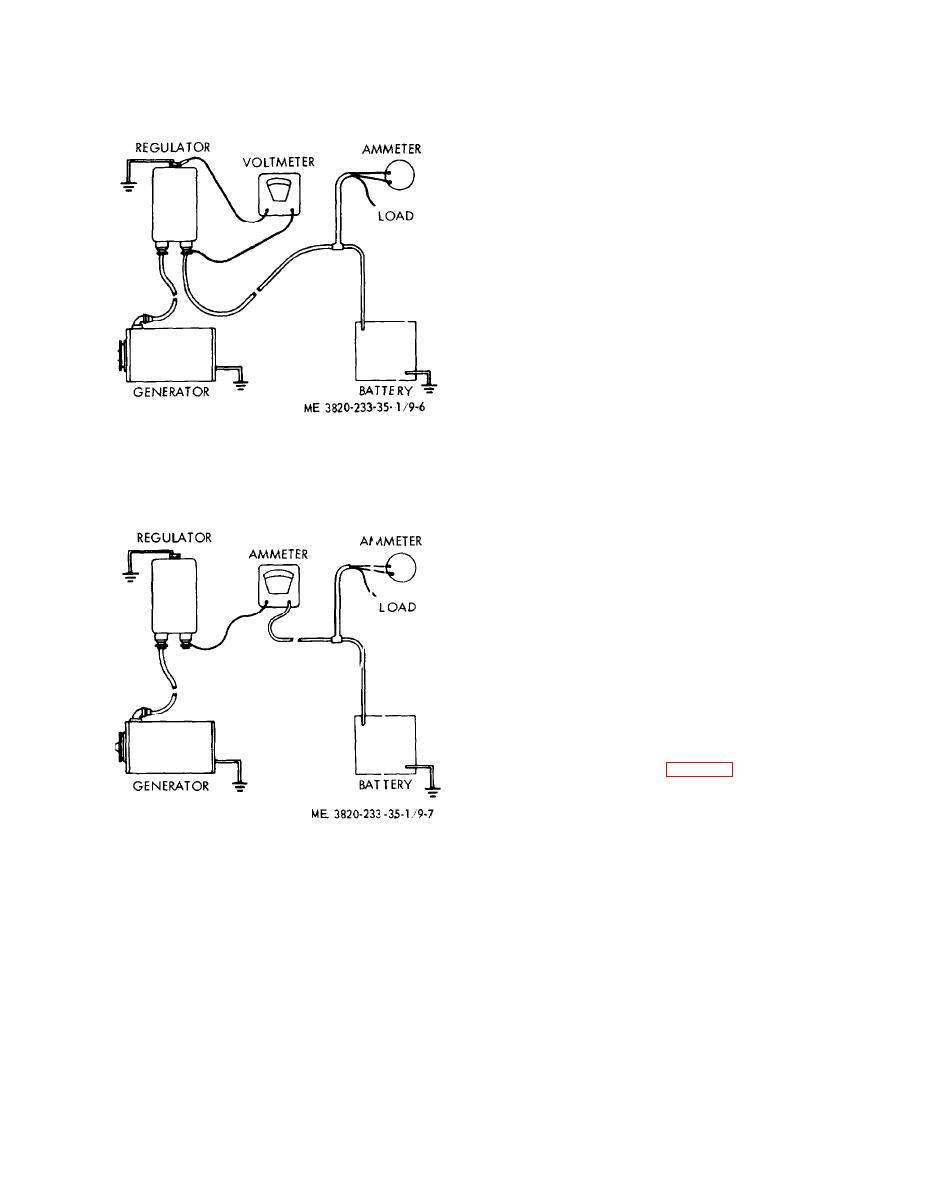
Figure 9-7. Meter connections for
regulator
current
(2) Plug the radiator openings. Insert
checks.
an air hose in radiator outlet pipe. Immerse
the radiator in water and apply 3-5 psi. Air
(c)
Jumper Lead Method-If the reg-
pressure to the radiator. Leaks will be indi-
ulator cover is removed and a jumper lead
cated by air bubbles. Solder leaks or replace
placed across the voltage regulator contact
an excessively damaged radiator.
points, the voltage regulator cannot operate.
(3) Inspect the radiator assembly for
Consequently, the generator output, will in-
other defects and damage. Replace an exces-
crease to its maximum as determined by the
sively damaged radiator core.
current regulator setting. Lights and acces-
3-10
