
b. Cleaning and Inspection. Clean and inspect the
starting switch for improper operation or damage.
Replace as necessary.
c. Installation. Install the starting switch on the
instrument panel in reverse of the instructions on figure
89. Engine Wiring and Warning Lights
a. Wiring.
(1) Removal. Remove the engine wiring from
the engine as instructed on figures 37 and
(2) Cleaning, Inspection, and Repair. Clean
and inspect the engine wiring. Repair or
replace as necessary.
(3) Installation. Install the engine wiring in
reverse of the instructions on figures 37
b. Warning Lights.
(1) Removal.
Remove the warning light
assembly as instructed on C, figure 41.
(2) Cleaning, Inspection, and Repair. Clean
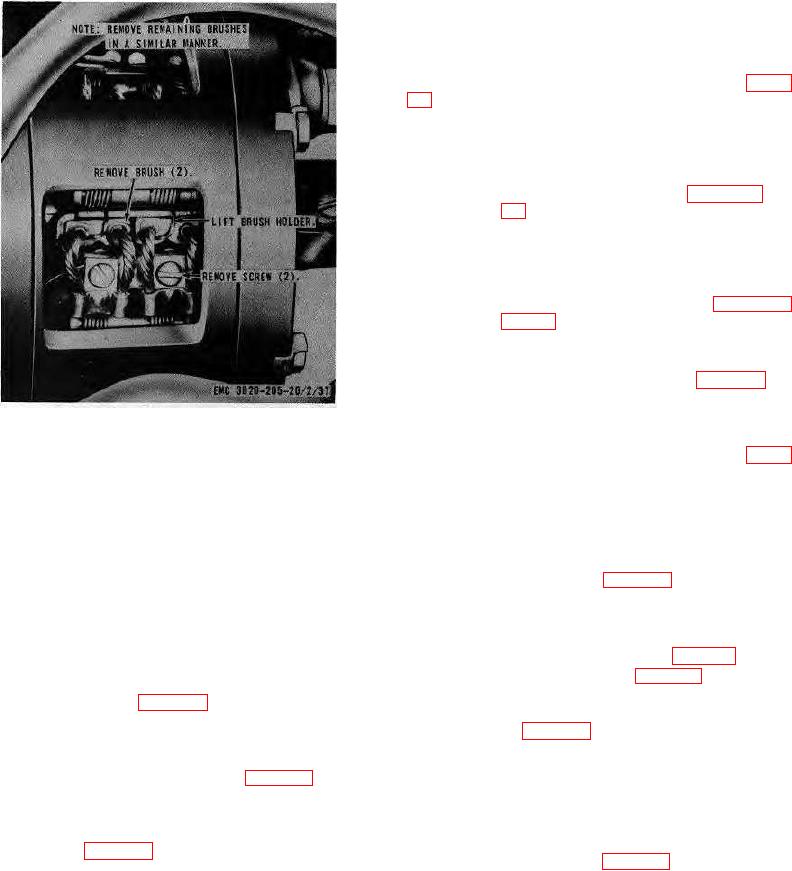
Figure 36 Starter brush, replacement.
and inspect, repair as necessary.
(3) Installation. Install the warning lights in
the reverse of the instructions on C, figure
41.
Section VI. ENGINE HOUSING
90. General
c. Installation. Install the doors on the housing in
The engine housing is constructed of preformed sheet
reverse of the instructions on figure 43.
metal which is comprised of doors, door supports, side
panels, hood, rear panel, and radiator cowling with the
93. Engine DOOR Supports and Side Panels
necessary hardware to construct the housing.
a. Removal.
(1) Remove the water lines (para. 91).
91. Water Drain Lines
(2) Remove the doors (para. 92).
a. Removal. Remove the drain lines from the
(3) Remove the engine door supports and
housing as instructed on figure 42.
side panels from the housing as instructed
b. Cleaning and Inspection. Clean and inspect all
on figure 44.
lines and replace as necessary.
b. Cleaning and Inspection. Clean and inspect the
c. Installation.
Install the drain lines on the
engine door supports and side panels for any damage
housing in reverse of the instructions on figure 42.
and replace as necessary.
c. Installation.
92. Doors
(1) Install the engine side panels and door
a. Removal. Remove the doors from the housing
supports on the housing in reverse of the
as instructed on figure 43.
instructions on figure 44.
b. Cleaning, Inspection, and Repair. Clean and
inspect the doors for any damage. Repair or replace as
necessary.
AGO 8157A
60