
TM 5-3820-233-35/2
pressure to the radiator. Leaks will be indicated by air
34. Water Pump
bubbles.
Solder leads or replace an excessively
damaged radiator.
a.
General. The water pump is mounted on
(3) Inspect the radiator assembly for
the front end of the blower and is driven by the lower
other defects and damage. Replace an excessively
blower rotor shaft. The centrifugal type water pump
damaged radiator core.
circulates coolant through the cylinder block, cylinder
head, radiator, oil cooler.
d.
Reassembly and Installation
b.
Removal. Refer to Operator's Manual.
c.
Disassembly. Disassemble the water pump
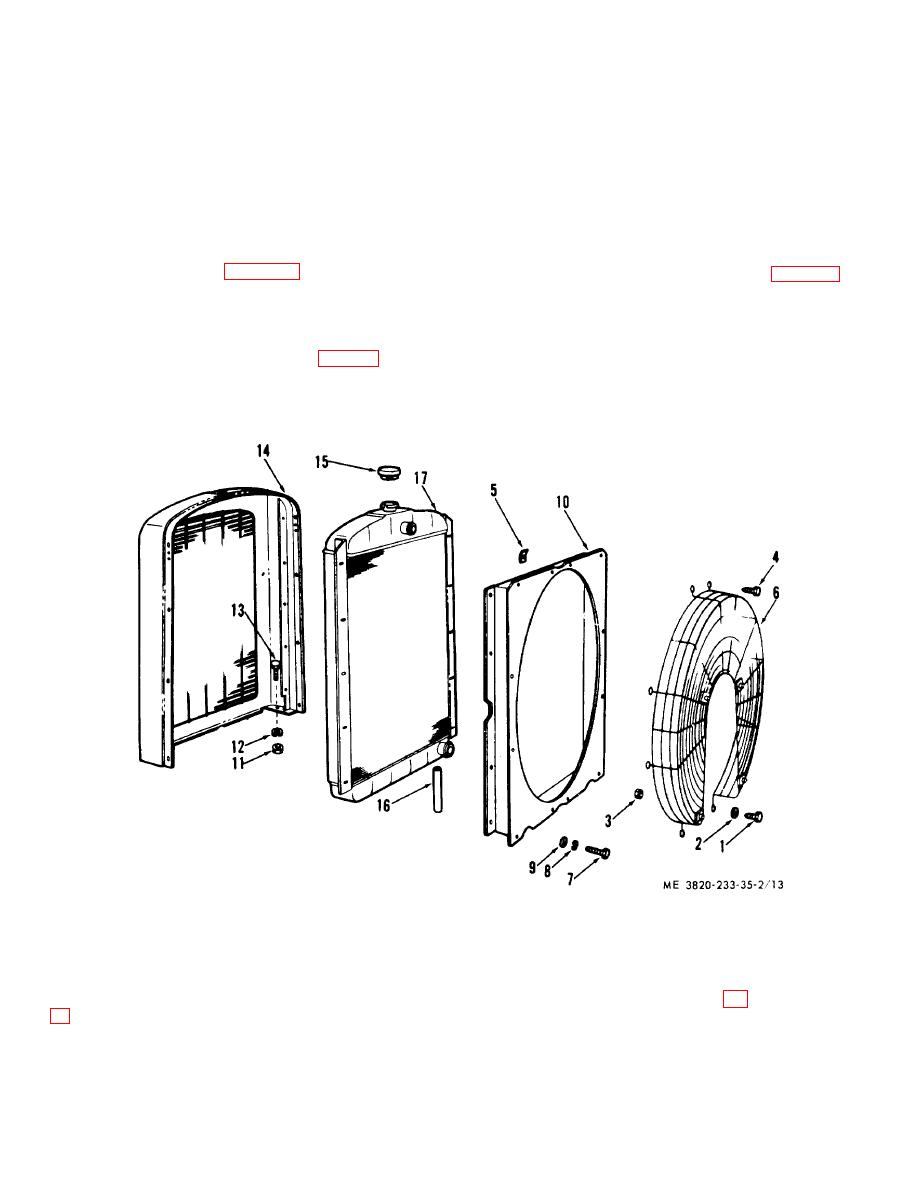
(1) Refer to figure 13 and assemble and
in the numerical sequence as illustrated on figure 14.
install the radiator assembly.
(2) Install the hoods, side panels, and tie
Note
rods (Operator's Manual).
It may be necessary to use an arbor
(3) Fill the radiator with coolant.
press to separate water pump shaft
(4) Install the power unit (para 23).
from impeller
1
Bolt
7
Bolt
13
Bolt
2
Washer
8
Lockwasher
14
Shell assembly
3
Nut
9
Washer
15
Cap
4
Bolt
10
Shroud
16
Hose
5
Speednut
11
Nut
17
Radiator
Guard
12
Lockwasher
Figure 13. Radiator assembly, exploded view.
3-11
